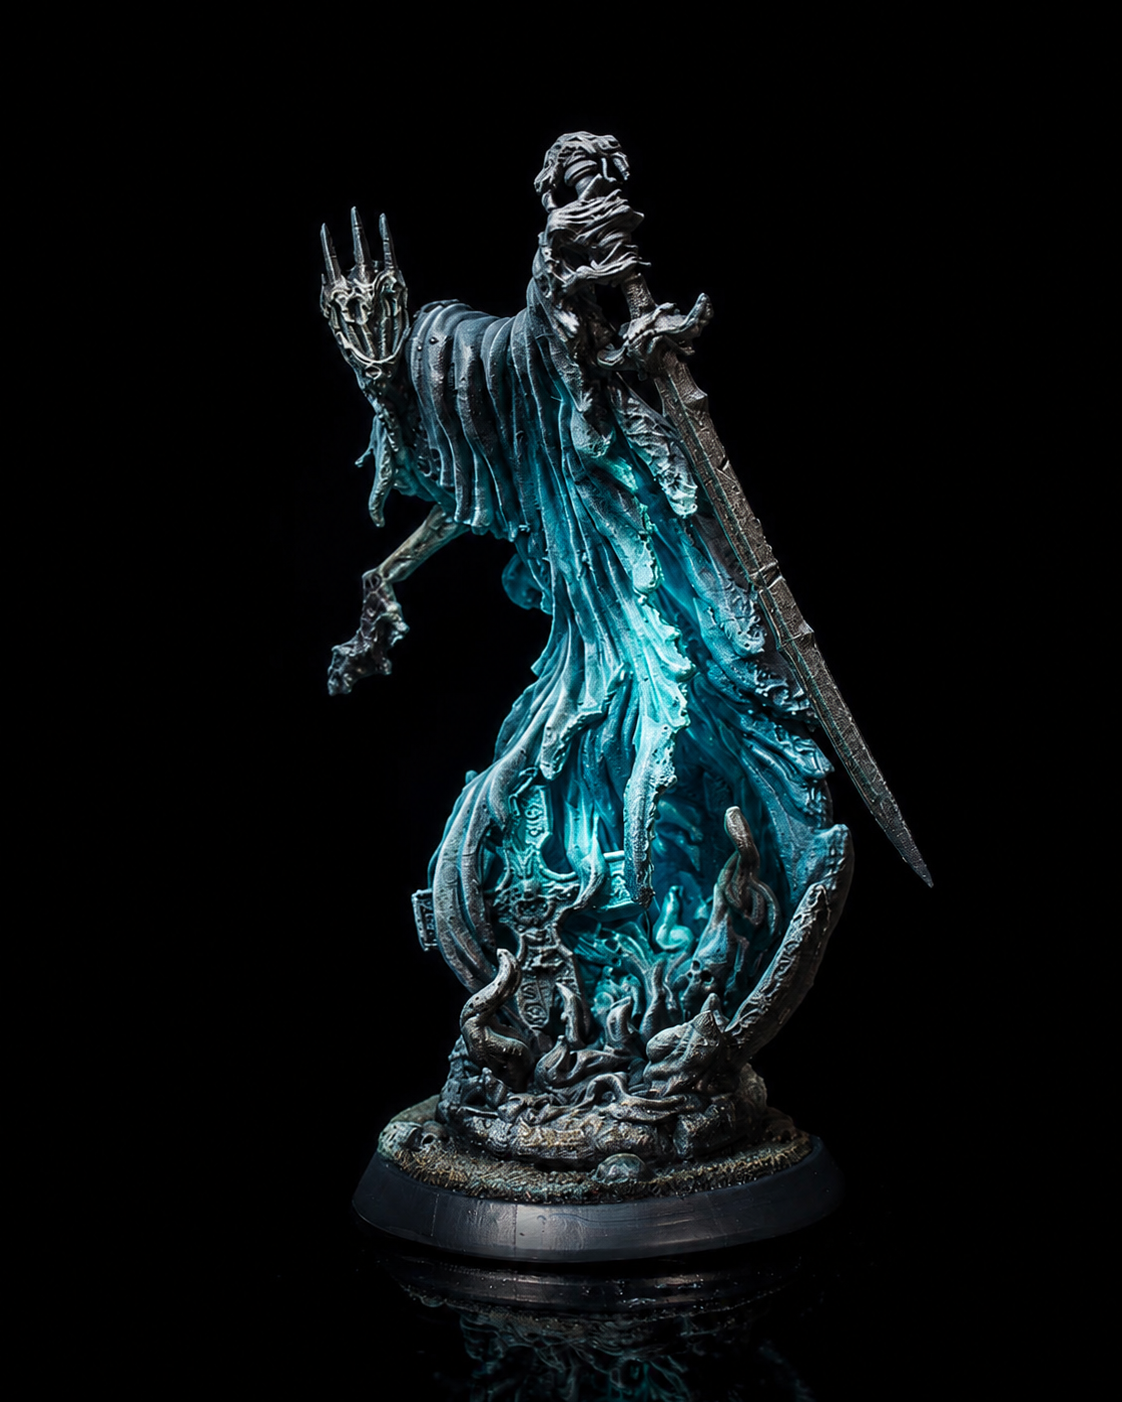
Horror miniatures live or die on atmosphere. A perfectly clean paint job with crisp edge highlights can look stunning on a knight or a wizard, but on something that’s meant to unsettle you, that same precision often works against the model. What horror needs is grime, shadow, and an unnatural light source that shouldn’t be there. This week we’re breaking down exactly how to get that effect, using our own Ghost of Mortamath as the demonstration piece.
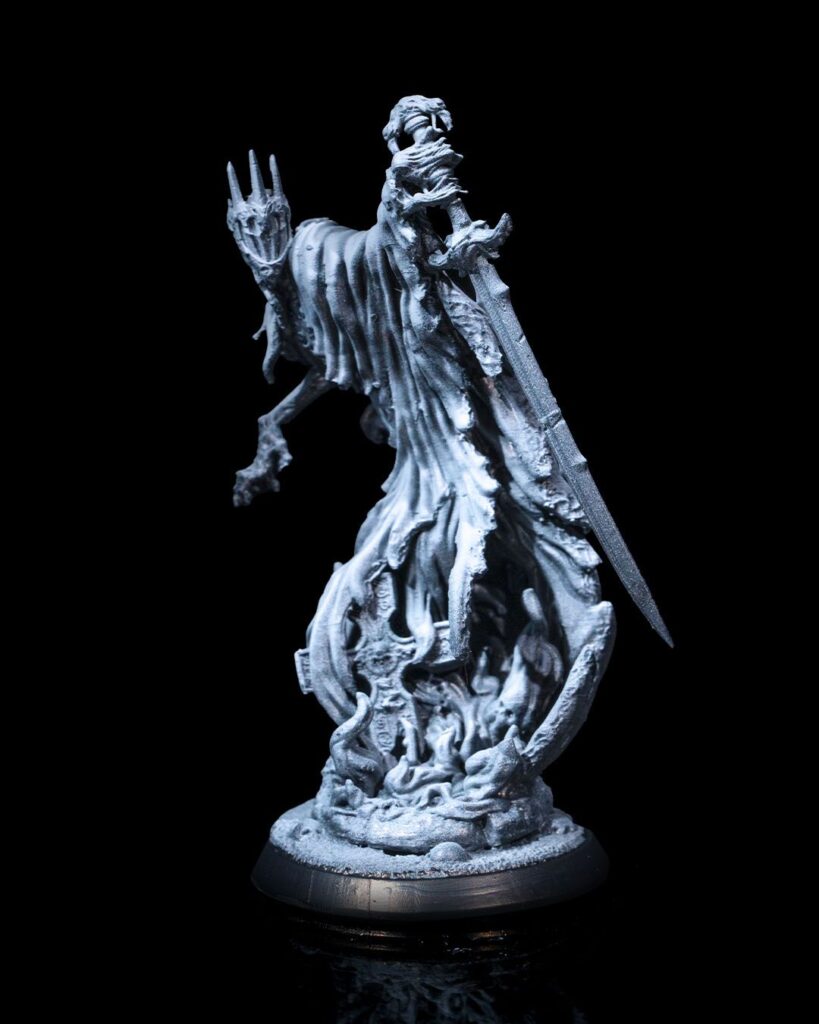
Mortamath is a good teaching model because it does most of the storytelling for you before you’ve even opened a paint pot. Tattered robes, a raised skeletal hand, a scenic base littered with skulls and roots. Your job as the painter is to lean into that with technique choices that reinforce dread rather than fight it. If you’d rather work with something more aggressive, everything in this guide applies just as well to The Demongloth, swapping the spectral blue glow for something closer to hellfire.
Why Wash-Heavy Techniques Suit Horror Subjects
Layering and edge highlighting are built around control. You’re deciding exactly where light falls and keeping every transition clean. Washes work the opposite way. You let a thinned, pigmented liquid pool naturally into the recesses of the sculpt, and the model’s own geometry does the storytelling for you.
That loss of control is exactly what horror painting wants. Real decay isn’t tidy. Grime doesn’t sit in neat lines, it pools unevenly in the folds of fabric and settles into bone crevices. A wash-heavy approach mimics that unpredictability far more convincingly than careful blending ever could, and it does it in a fraction of the time.
Choosing Your Base Colours
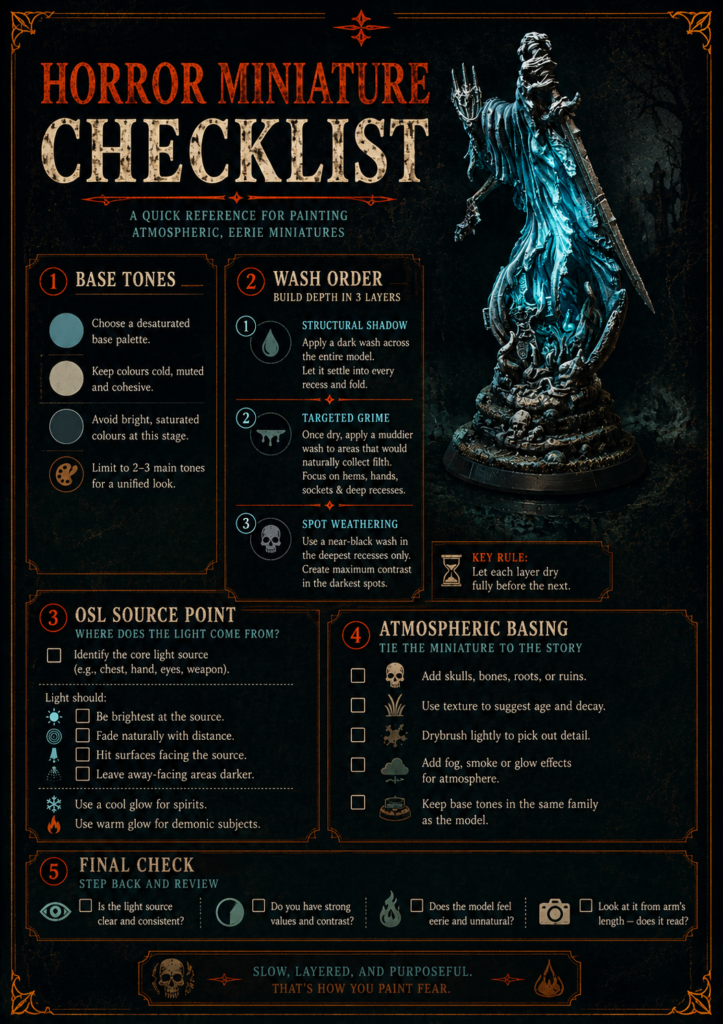
Before any wash goes near the model, the base coat needs to sit slightly desaturated. For Mortamath, a cold, ashy blue-grey works well across the robes, with a paler, almost bone-white tone on the exposed hand and skull details. Avoid anything too saturated at this stage. You want the wash to be doing the emotional heavy lifting, not fighting against an already vivid base.
Keep your palette narrow. Two or three closely related greys or blues for a ghost, or ember reds and charred browns for something more demonic, will read as far more cohesive than a wide, colourful palette ever will on a horror piece.
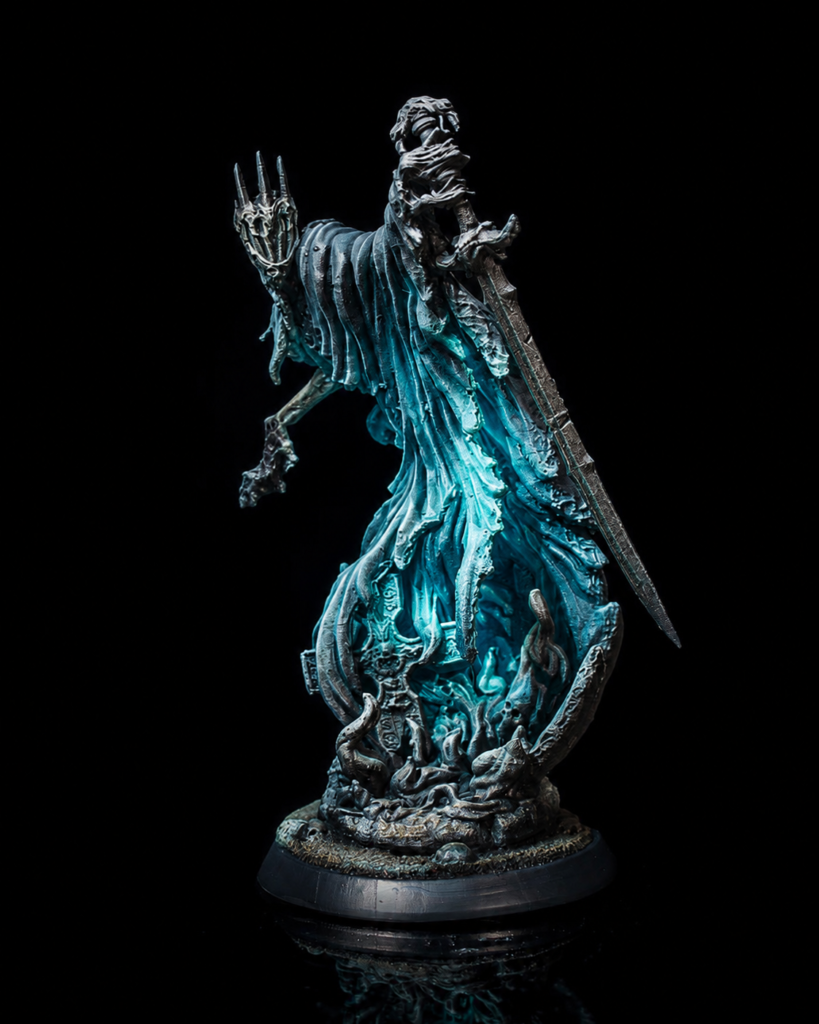
Layering Washes for Depth and Decay
A single wash coat rarely gives horror miniatures the depth they need. The technique that transforms a decent model into something genuinely unsettling is building up several thinned layers rather than relying on one heavy application.
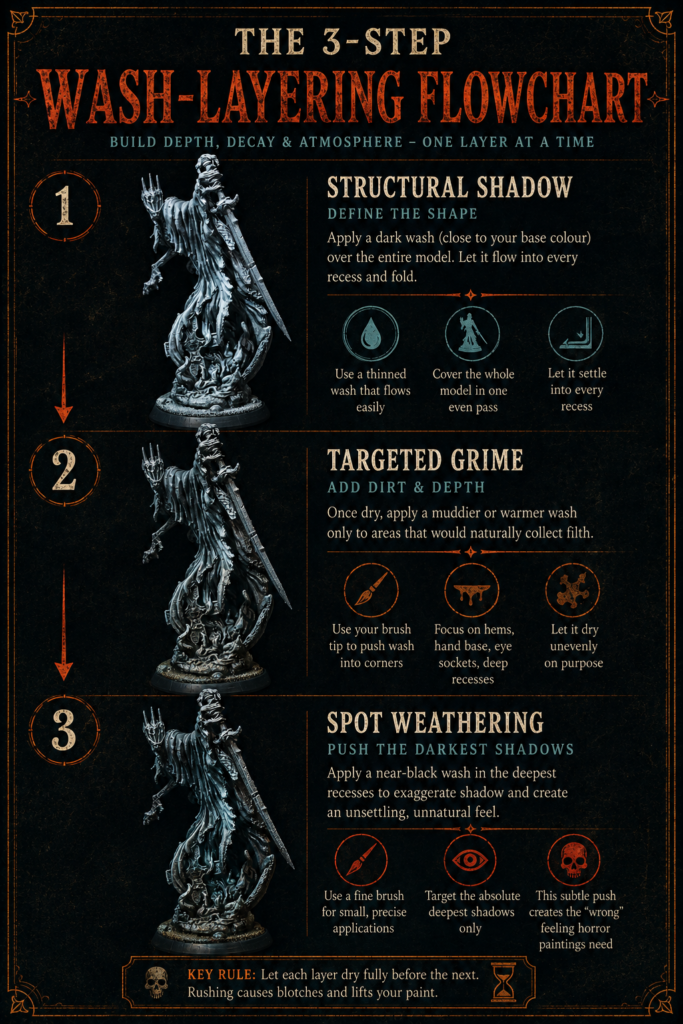
The First Pass: Structural Shadow
Start with a wash mixed close to your base colour but noticeably darker, thinned enough to flow rather than sit. Apply it across the entire model in one pass, letting it settle into every fold of the robe, every gap between ribs, every crevice on the scenic base. This first layer is doing structural work. It’s defining the model’s shape through shadow before you’ve added a single deliberate detail.
The Second Pass: Targeted Grime
Once the first wash is fully dry, go back in with a second, more targeted application using a slightly warmer or muddier tone. This time you’re not covering the whole model. You’re picking out the areas that would naturally collect the most filth: the hem of the robe where it drags along the ground, the base of the clawed hand, the deepest recesses around the eye sockets. Push this wash right into the corners with the tip of your brush and let it dry unevenly on purpose.
The Third Pass: Spot Weathering
A final, very selective wash in a near-black tone along the absolute deepest recesses ties the whole effect together. This isn’t a full-coverage layer, it’s a handful of pinpoint touches that push the darkest shadows just a little further than natural light would explain. That slight exaggeration is what reads as “wrong” to a viewer’s eye, which is exactly the effect horror painting is chasing.
Between each of these passes, resist the urge to rush. A wash applied over a damp layer will bloom unpredictably and lift the coat underneath, so give each stage proper drying time before moving on.
Adding Object Source Lighting for a Spectral Glow
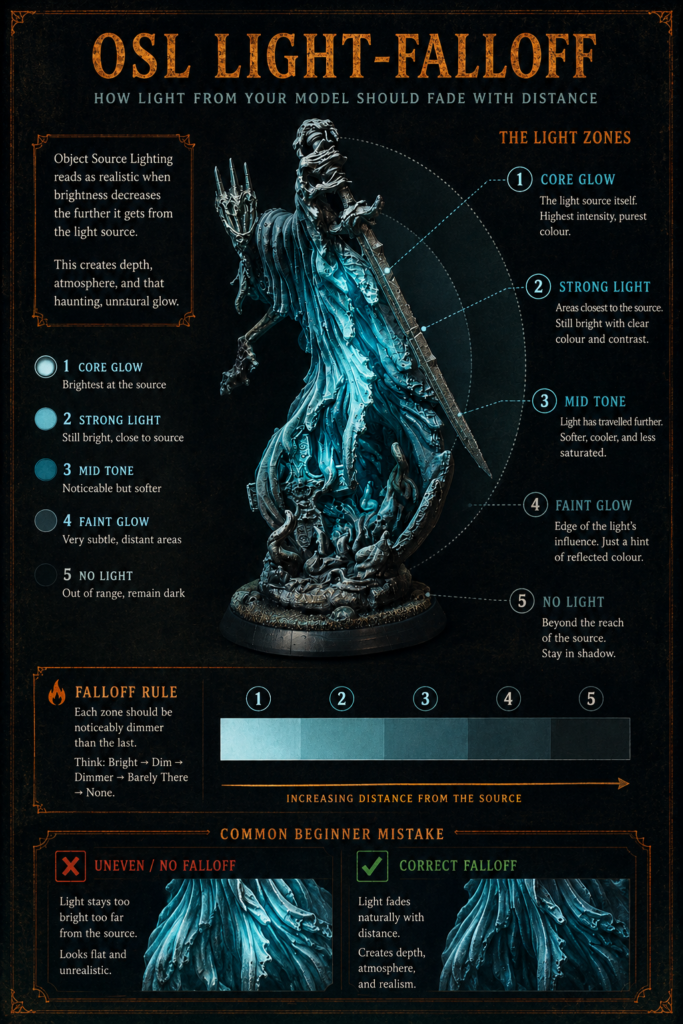
Once the wash work has built up believable grime and shadow, Object Source Lighting, or OSL, is what pushes a horror miniature from “well painted” into “genuinely eerie.” OSL simulates a light source coming from the model itself, and on a ghost subject like Mortamath, that means treating the spirit’s own translucent form as the light.
Finding Your Light Source
On Mortamath, the natural light source is the figure’s chest and outstretched hand, the areas an artist would frame as the “core” of a spectral presence. Everything nearby should catch a faint reflection of that glow, fading out the further it gets from the source. Trace the light mentally before you paint a single stroke: which folds of robe would catch the glow, which parts of the base beneath the figure would pick up a faint cast reflection.
Building the Glow
Work from dark to light in thin glazes, the same way you built up the wash layers. Start with a heavily thinned mix of your glow colour, a cool cyan or spectral green works well for a ghost, applied only in the areas closest to the source. Gradually intensify the colour and add small amounts of white as you move toward the source itself, finishing with a near-white highlight right at the point of “emission.”
The single most common OSL mistake is making the glow too uniform. Real light falls off quickly, so the transition from bright source to ambient shadow should happen within a very short distance on the model, not gradually across the whole figure. If you’re newer to the technique, a short, focused video is worth more than pages of description. This walkthrough on painting glow effects is a good no-airbrush introduction that translates directly to a spectral subject like Mortamath, and this tutorial on Object Source Lighting goes deeper into the underlying light theory if you want to understand the “why” behind the falloff.
Where the Glow Meets the Wash
This is the step painters most often skip, and it’s the one that sells the whole effect. Once your OSL glow is in place, go back over the transition zone with an extremely thin glaze of your wash colour from earlier. This softens the hard edge between “painted glow” and “washed shadow” so the two techniques read as one continuous light source rather than two separate paint jobs sitting side by side.
Basing Suggestions That Reinforce the Story
Mortamath’s scenic base already includes roots and scattered skulls, which gives you a head start most miniatures don’t have. The goal at the basing stage is to make sure the ground looks like it belongs to the same unsettling world as the figure standing on it.
Keep the base’s palette darker and less saturated than the miniature itself. A base that competes for attention pulls the eye away from the figure, when everything about a horror piece should funnel focus back to the subject. A heavy wash across the entire base, followed by a light, dry-brushed highlight only on the most raised texture, keeps it grounded without stealing the spotlight.
If you’ve built OSL into the figure, let a faint hint of that same glow colour touch the ground immediately beneath the light source. A subtle cast reflection on the base sells the idea that the light is genuinely coming from the model, not just painted onto it in isolation. Static grass or flock should be used sparingly, if at all. A few tufts of dead, desaturated grass around the base’s edge read as far more convincing than a full lawn, and they keep the focus on decay rather than growth.
Bringing the Whole Piece Together
Once your washes, OSL, and basing are all in place, step back and check the model from a normal viewing distance rather than under macro lighting. Horror effects that look subtle up close often read perfectly at tabletop distance, and effects that look strong under a desk lamp can occasionally overwhelm the model once it’s viewed the way it’ll actually be seen at the table.
A final, extremely thin all-over wash in a neutral dark tone can help unify any areas where the different technique passes feel slightly disconnected. Seal with a matte varnish once everything is dry. Horror pieces in particular lose a lot of their atmosphere under a glossy finish, since real shadow and grime don’t reflect light evenly.
If you want a physical reference to work from while painting, our resin miniature collection includes both Mortamath and the wider Ironworks lineup, each supplied unpainted and ready for exactly this kind of technique work.
Where myths take form.
Continue Your Journey
- Introducing the Ironworks of Aurumdell — the collection’s launch post, covering the steampunk lore behind our first miniature range
Leave a Reply