Author: angelatempest

  • What Scale Miniature Should I Buy? A Beginner’s Guide to 32mm vs 75mm

    What Scale Miniature Should I Buy? A Beginner’s Guide to 32mm vs 75mm

    Standing in front of a miniature listing for the first time, most new collectors hit the same wall. The sculpt looks incredible in the photos, the lore pulls you in, and then you spot a number next to the word “scale” and have no idea what it actually means for the model arriving at your door. Scale is one of those hobby fundamentals nobody explains clearly enough before you buy, and getting it wrong is an easy way to end up with a miniature that does not fit your table, your army, or your display shelf.

    This guide breaks down the two scales that matter most for anyone starting out: 32mm and 75mm. By the end, you will know what each number actually refers to, how the scales differ in use and in painting, and which one fits your goals as a collector.

    What Does Miniature Scale Actually Mean?

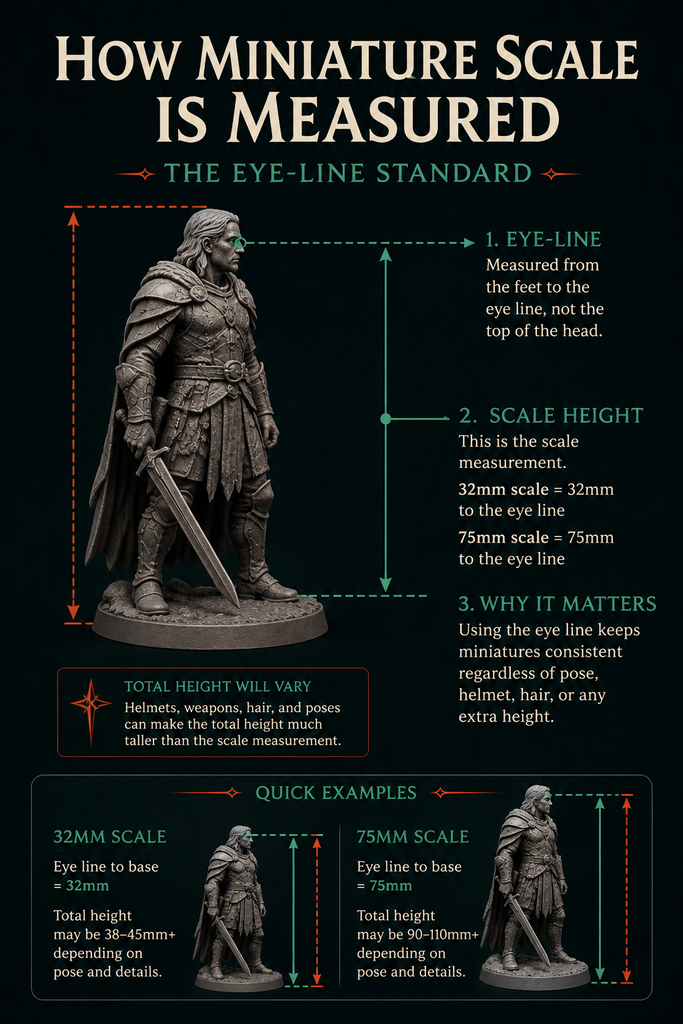
    Scale is usually stated as the approximate height of an average standing human figure from the feet to the eye line, not to the top of the head. This convention exists so that helmets, horns, hats, and tall hair do not distort the number a buyer relies on. Not every seller follows this convention consistently, so it is worth checking a listing’s stated reference point rather than assuming every “32mm” or “75mm” figure was measured the same way.
    Is a 32mm Miniature Actually 32mm Tall?

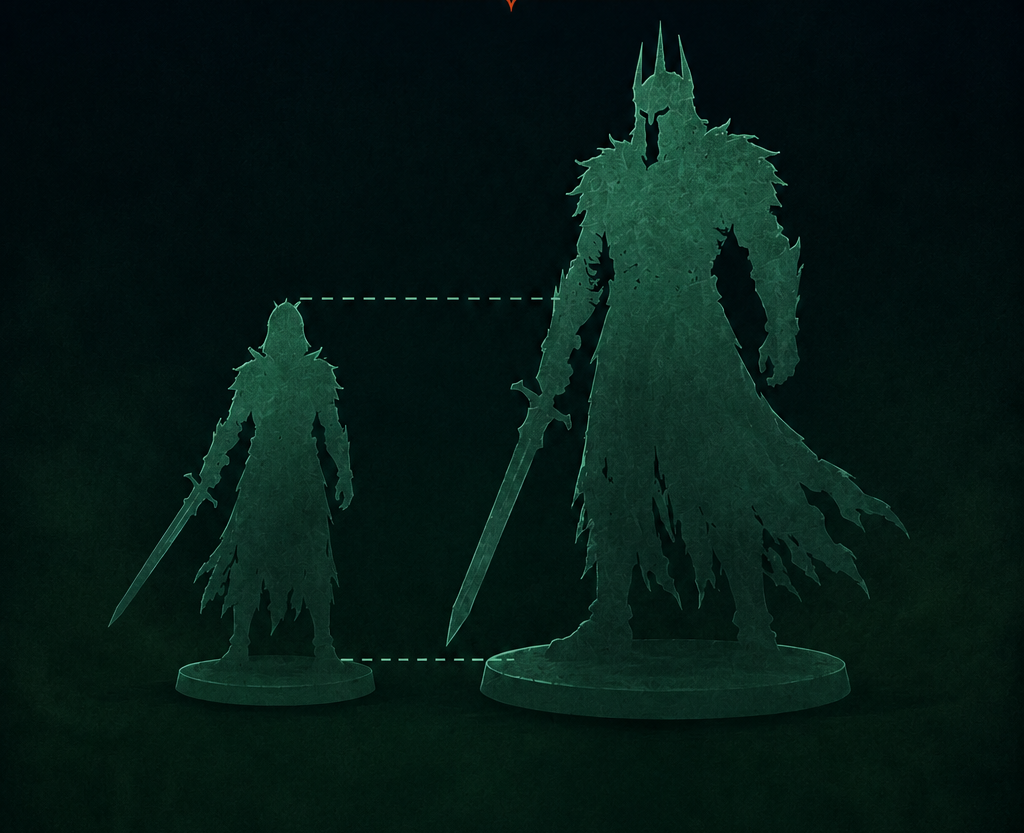
    Not in total height, no. A 32mm figure is 32mm to eye height, which means a helmet, a weapon raised overhead, or a dramatic pose can push the total model well past that number. Two miniatures both marked 32mm scale can still look noticeably different in size once pose, base size, and sculpting style are factored in.

    Total height would seem like the more intuitive measurement, but it falls apart the moment two miniatures are compared in different poses. A crouching rogue and a rearing dragon rider are both valid 32mm sculpts, yet their total heights would be wildly different if that were the reference point. Eye height keeps the comparison consistent regardless of pose.

    32mm vs 75mm: The Core Difference
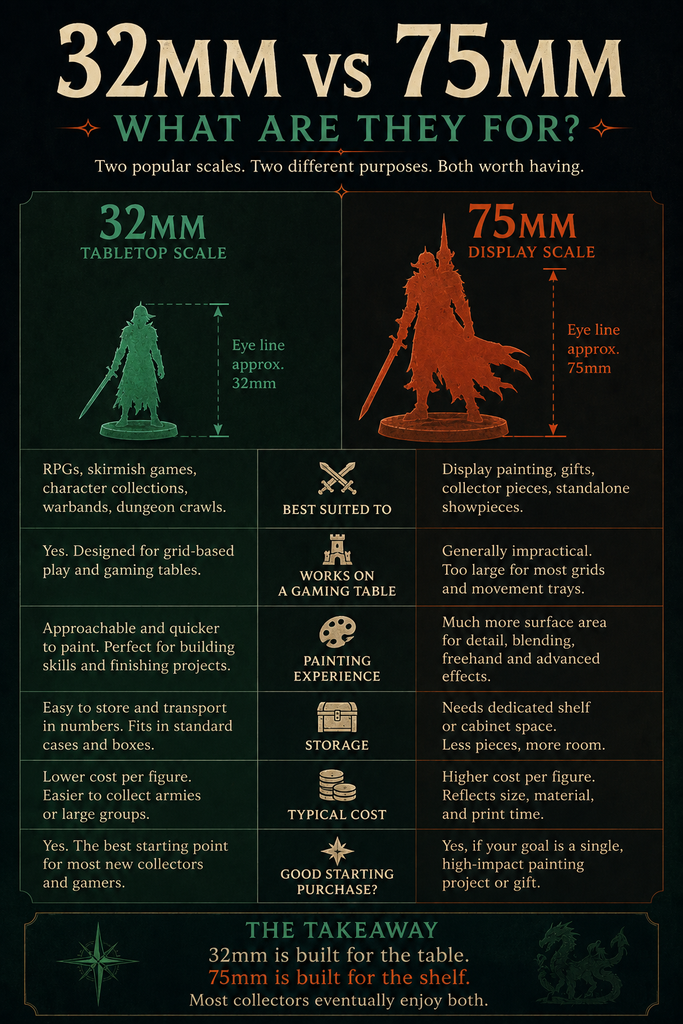
    The simplest way to think about it is that 32mm is the playable everyday scale, and 75mm is the project-piece scale. Neither is objectively better. They serve different purposes, and most serious collectors eventually own miniatures at both.

    32mm75mm
    Best suited toRPGs, skirmish games, character collectionsDisplay painting, gifts, standalone showpieces
    Works on a gaming tableYes, built for itGenerally impractical for grid-based play
    Painting experienceApproachable, faster to finishFar more surface area for detail and blending
    StorageEasy to store and transport in numbersNeeds dedicated shelf or cabinet space
    Typical costLower per figureHigher, reflecting size, material, and print time
    Good starting purchaseYes, especially for a gaming collectionYes, if the goal is a single painting project

    32mm: Made for the Table

    32mm is the scale most people mean when they say “miniature” in a tabletop RPG or wargaming context. It is the scale used by the major tabletop game systems, and it is what most terrain, movement trays, and gaming tables are designed around.

    If you are building a D&D party, stocking an army, or filling out a dungeon crawl, 32mm is almost certainly the answer. It is compact enough to store in real numbers, cheap enough to collect at volume, and universally compatible with the terrain and basing standards the rest of the hobby uses. Our own Ironworks of Aurumdell collection is built at this scale specifically so every piece plays nicely on a standard tabletop.

    What to Expect When Painting 32mm

    32mm rewards patience over precision equipment. You do not need expensive optics to get a good result, though many painters do use a basic magnifying lamp for facial details and eyes. Detail is present but forgiving, which makes 32mm the friendlier starting point if you have never picked up a brush before.

    Base size matters more at this scale than people expect. A 25mm or 32mm round base is standard for most humanoid figures, and matching your base size to the game system you play, whether that is 5E, Pathfinder, or a specific wargame, avoids awkward mismatches once your collection grows.

    75mm: Made for the Shelf

    75mm sits in a completely different category of the hobby. At this size, a miniature stops being a gaming piece and becomes a display piece in its own right, closer in spirit to a small sculpture than a tabletop token. The jump from 32mm is not incremental, since the extra size gives dramatically more room for fine detail, freehand work, and layered shading.

    This is the scale collectors reach for when the goal is a single showpiece rather than an army. Face detail, fabric texture, weathering effects, and object source lighting all read far more clearly at 75mm, which is exactly why painters who want to push their technique tend to gravitate here. It is also why 75mm pieces are treated as hero products rather than everyday stock, taking longer to paint, longer to photograph well, and longer to do justice to.

    Why 75mm Suits a Different Kind of Buyer

    If your shelf is more gallery than game table, 75mm is worth considering even as a beginner. You will trade quantity for depth. A single 75mm figure will take considerably longer to paint than a 32mm miniature, but the finished result stands on its own as a centrepiece rather than one soldier among fifty.

    It is worth being honest about the trade-off before buying. A 75mm miniature is not a bigger version of a quick weeknight project. It is a slower, more deliberate undertaking, and treating it that way from the start leads to a far better result than rushing it like a regular tabletop piece.

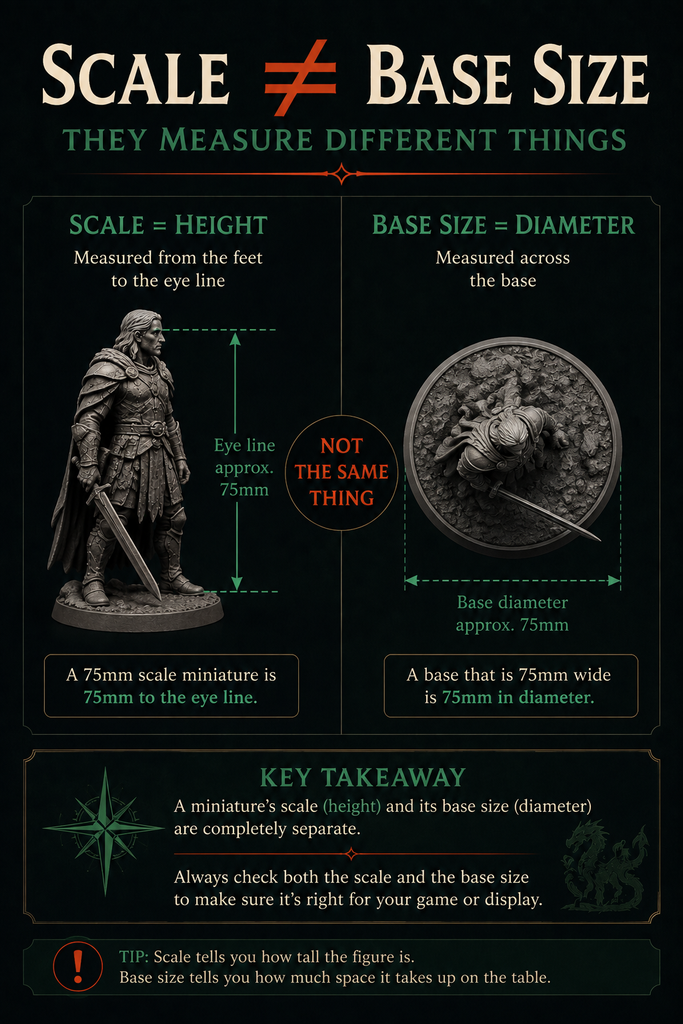
    One distinction worth clearing up here: a 75mm-scale miniature and a 75mm base are not the same thing. Scale describes the figure’s intended size, while a base diameter describes the footprint a model stands on, often used for a large creature’s tabletop presence regardless of the figure’s own scale. Checking both figures separately avoids a confusing surprise on arrival.

    Why Don’t All 32mm Miniatures Look the Same Size?

    This catches a lot of new collectors off guard, especially when they are trying to match an existing party or army. A few things cause the variation even within a single stated scale.

    Proportions vary by sculpting style. Heroic scale deliberately enlarges features such as heads, hands, weapons, and armour so they stay visible and durable at tabletop distance, while true-scale figures use slimmer, more realistic anatomy. A true-scale 32mm figure can look smaller or less bulky standing next to a heroic-style 32mm miniature, even though both are correctly labelled.
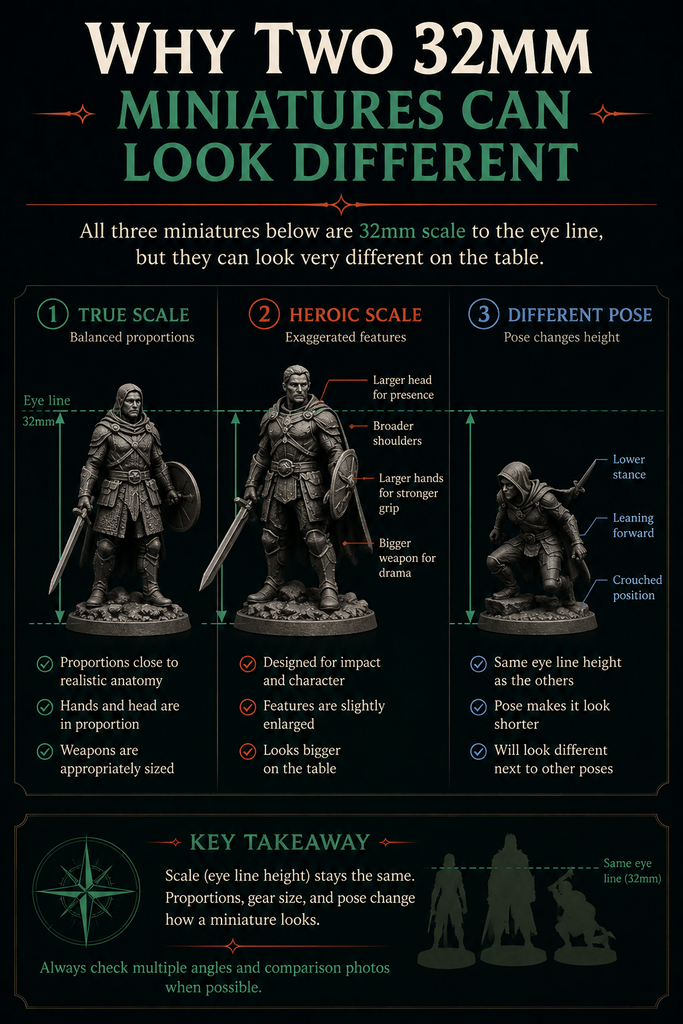
    Pose changes the visual height too. A dramatic running, crouching, flying, or leaning pose will not measure the same way a neutral standing figure does, and a larger scenic base can make a model feel taller and more imposing without changing its stated scale at all. If you are matching an existing collection, comparing product photos against a ruler or a miniature you already own is the safest way to check before buying.

    Can You Use a 75mm Miniature for Tabletop Gaming?

    Technically yes, but it rarely works well on a standard grid or hex table. A 75mm figure will tower over everything else in a way that breaks immersion rather than adding to it, and it will not fit cleanly into movement trays or terrain scaled for 32mm play.

    Where 75mm does work at the table is as an occasional set piece rather than a regular participant. A single 75mm miniature used sparingly, for a climactic boss reveal or a framed centrepiece on the game master’s side of the table, can add real impact precisely because it stands apart from everything else in play.

    Should I Buy 32mm or 75mm?

    If you want a miniature for tabletop RPGs, skirmish games, campaign play, or a compact growing collection, 32mm is the versatile choice. It is detailed enough to paint enjoyably, small enough to store and use easily, and visually at home with other modern gaming miniatures.

    If you want a display piece rather than a gaming token, 75mm is the one to reach for. It suits a special character, a gift, a shelf centrepiece, or a longer painting project where the appeal is exploring skin tones, armour effects, and freehand detail up close.

    If you are genuinely unsure, start with 32mm. It is the lower-commitment, more versatile first purchase, and moving up to a 75mm hero piece once you have a better sense of your own painting style is an easy step from there. That said, if display work is clearly what draws you in rather than gaming, there is no rule that says you have to start small. Some painters actually find the extra surface area on a 75mm sculpt makes certain techniques easier to see and control, not harder.

    Getting the Scale Right for Your Setup

    Before buying, think about where the finished miniature is actually going to live. A 32mm figure disappears a little on an empty shelf but shines on a crowded tabletop surrounded by terrain and other models. A 75mm figure needs breathing room, ideally its own spot on a shelf or cabinet where it will not be dwarfed by clutter or competing for attention with a dozen smaller pieces.

    It is also worth checking what scale the rest of your existing collection uses, if you have one. Mixing 32mm and 75mm figures on the same game table looks jarring for the reasons already covered above, so keep gaming pieces consistent and reserve 75mm for standalone display purposes. For a deeper technical breakdown of scale conventions across the wider hobby, 3D Central’s guide to miniature scales is a solid reference if you want to go further than the basics covered here.
    Scale is one of the first decisions every miniature collector has to make, and it shapes everything that follows, from how you paint to how you store and display the finished result. Whether you start with a full 32mm party or a single ambitious 75mm centrepiece, understanding what those numbers actually mean puts you in a far better position to buy with confidence.

    Where myths take form.
    Continue Your Journey

  • Painting Guide: How to Paint a Horror-Themed Miniature

    Painting Guide: How to Paint a Horror-Themed Miniature

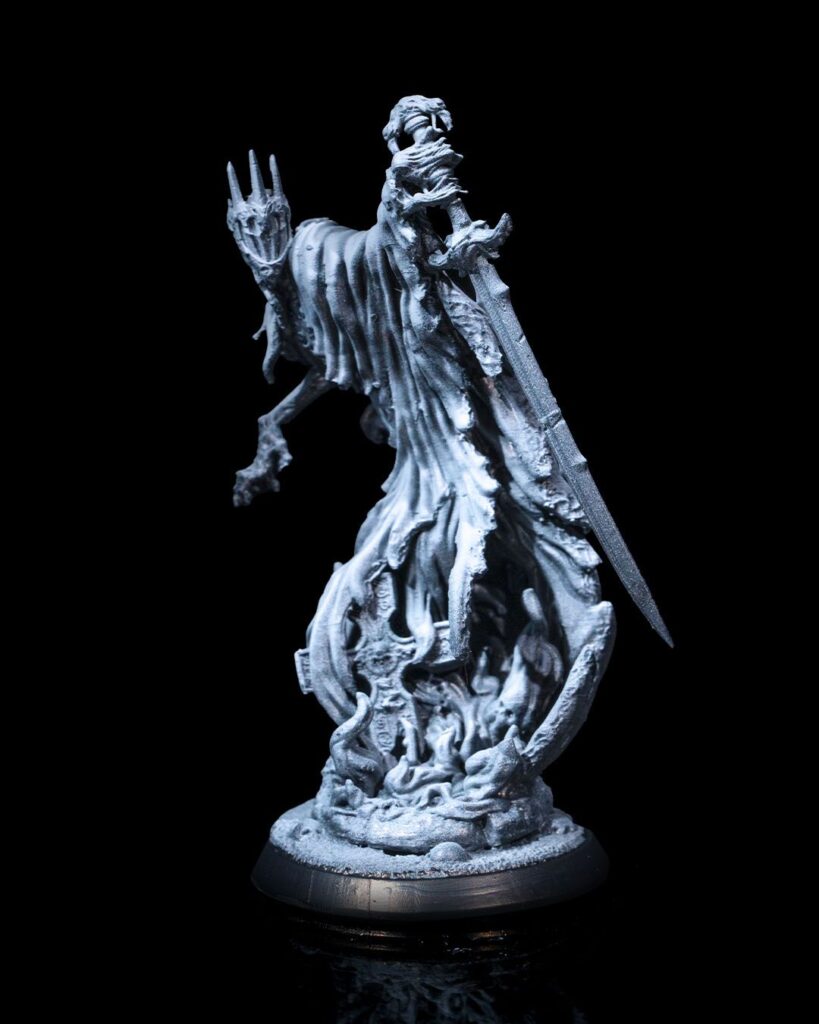
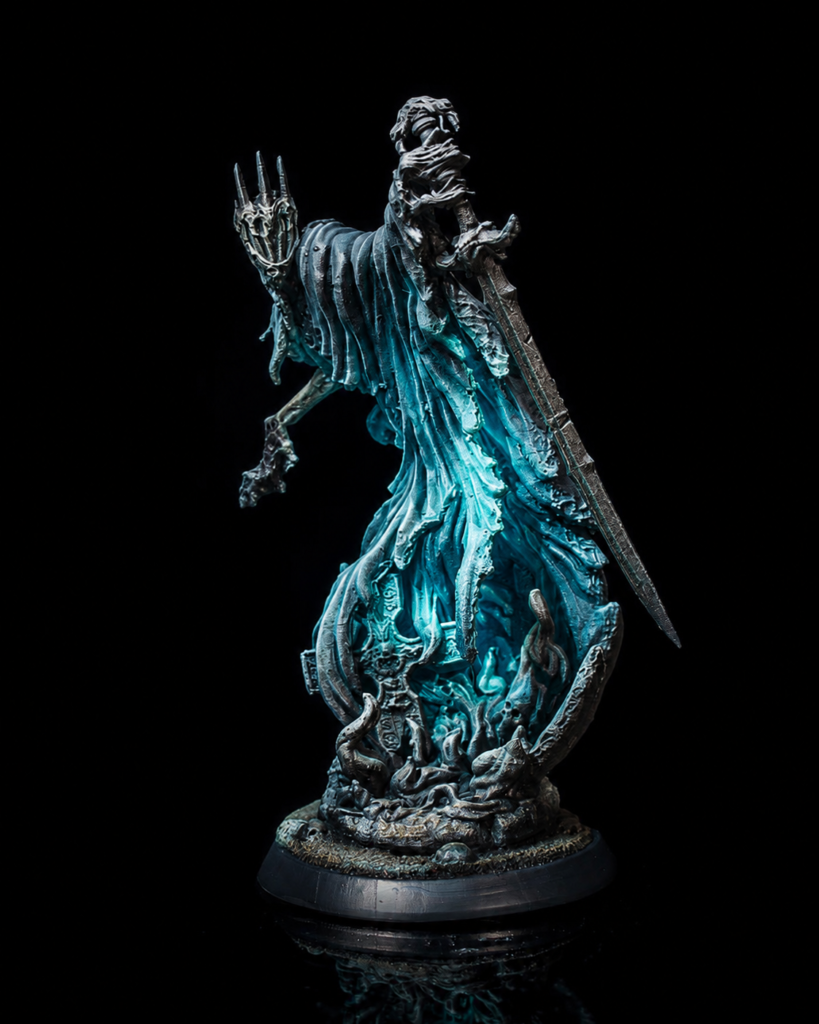
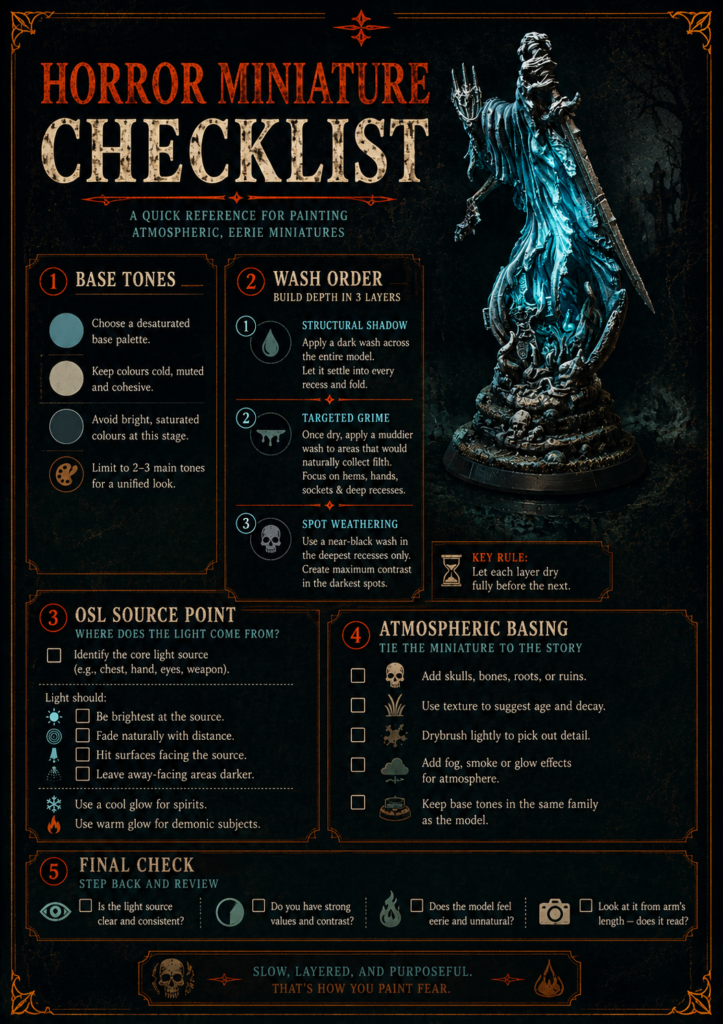
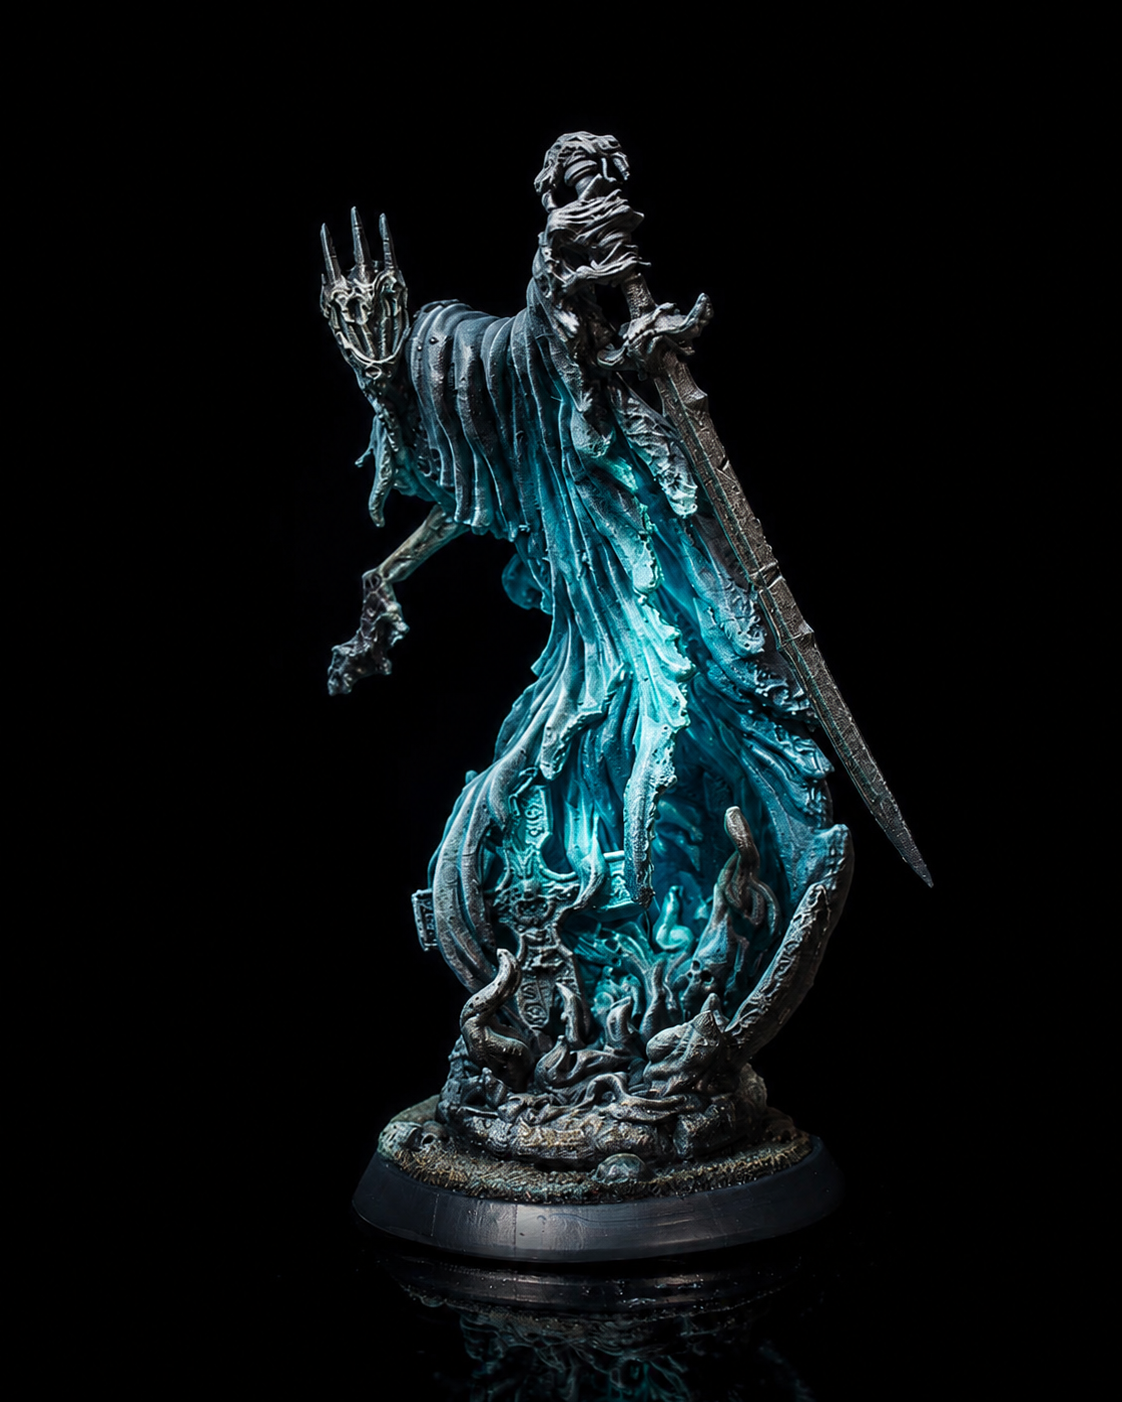
    Horror miniatures live or die on atmosphere. A perfectly clean paint job with crisp edge highlights can look stunning on a knight or a wizard, but on something that’s meant to unsettle you, that same precision often works against the model. What horror needs is grime, shadow, and an unnatural light source that shouldn’t be there. This week we’re breaking down exactly how to get that effect, using our own Ghost of Mortamath as the demonstration piece.

    Mortamath is a good teaching model because it does most of the storytelling for you before you’ve even opened a paint pot. Tattered robes, a raised skeletal hand, a scenic base littered with skulls and roots. Your job as the painter is to lean into that with technique choices that reinforce dread rather than fight it. If you’d rather work with something more aggressive, everything in this guide applies just as well to The Demongloth, swapping the spectral blue glow for something closer to hellfire.

    Why Wash-Heavy Techniques Suit Horror Subjects

    Layering and edge highlighting are built around control. You’re deciding exactly where light falls and keeping every transition clean. Washes work the opposite way. You let a thinned, pigmented liquid pool naturally into the recesses of the sculpt, and the model’s own geometry does the storytelling for you.

    That loss of control is exactly what horror painting wants. Real decay isn’t tidy. Grime doesn’t sit in neat lines, it pools unevenly in the folds of fabric and settles into bone crevices. A wash-heavy approach mimics that unpredictability far more convincingly than careful blending ever could, and it does it in a fraction of the time.

    Choosing Your Base Colours

    Before any wash goes near the model, the base coat needs to sit slightly desaturated. For Mortamath, a cold, ashy blue-grey works well across the robes, with a paler, almost bone-white tone on the exposed hand and skull details. Avoid anything too saturated at this stage. You want the wash to be doing the emotional heavy lifting, not fighting against an already vivid base.

    Keep your palette narrow. Two or three closely related greys or blues for a ghost, or ember reds and charred browns for something more demonic, will read as far more cohesive than a wide, colourful palette ever will on a horror piece.

    Layering Washes for Depth and Decay

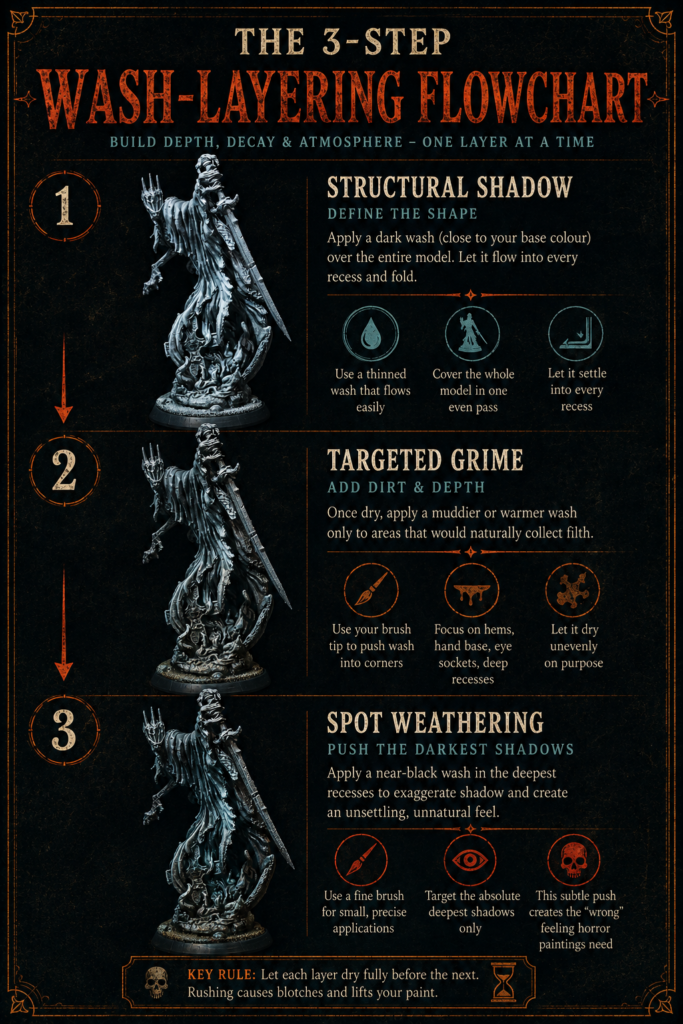
    A single wash coat rarely gives horror miniatures the depth they need. The technique that transforms a decent model into something genuinely unsettling is building up several thinned layers rather than relying on one heavy application.

    The First Pass: Structural Shadow

    Start with a wash mixed close to your base colour but noticeably darker, thinned enough to flow rather than sit. Apply it across the entire model in one pass, letting it settle into every fold of the robe, every gap between ribs, every crevice on the scenic base. This first layer is doing structural work. It’s defining the model’s shape through shadow before you’ve added a single deliberate detail.

    The Second Pass: Targeted Grime

    Once the first wash is fully dry, go back in with a second, more targeted application using a slightly warmer or muddier tone. This time you’re not covering the whole model. You’re picking out the areas that would naturally collect the most filth: the hem of the robe where it drags along the ground, the base of the clawed hand, the deepest recesses around the eye sockets. Push this wash right into the corners with the tip of your brush and let it dry unevenly on purpose.

    The Third Pass: Spot Weathering

    A final, very selective wash in a near-black tone along the absolute deepest recesses ties the whole effect together. This isn’t a full-coverage layer, it’s a handful of pinpoint touches that push the darkest shadows just a little further than natural light would explain. That slight exaggeration is what reads as “wrong” to a viewer’s eye, which is exactly the effect horror painting is chasing.

    Between each of these passes, resist the urge to rush. A wash applied over a damp layer will bloom unpredictably and lift the coat underneath, so give each stage proper drying time before moving on.

    Adding Object Source Lighting for a Spectral Glow

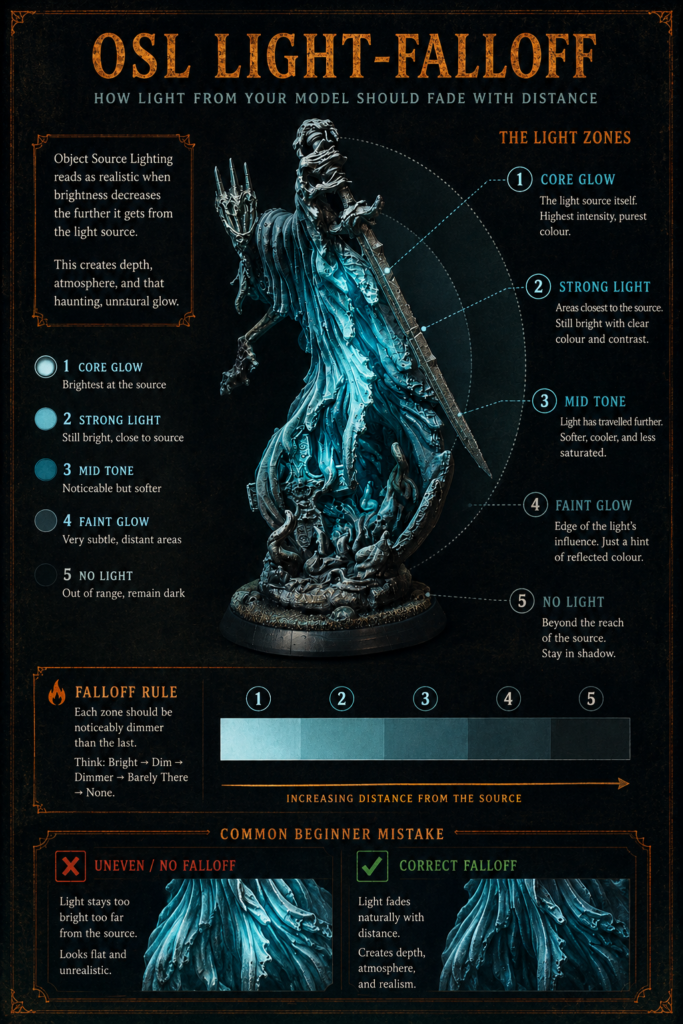
    Once the wash work has built up believable grime and shadow, Object Source Lighting, or OSL, is what pushes a horror miniature from “well painted” into “genuinely eerie.” OSL simulates a light source coming from the model itself, and on a ghost subject like Mortamath, that means treating the spirit’s own translucent form as the light.

    Finding Your Light Source

    On Mortamath, the natural light source is the figure’s chest and outstretched hand, the areas an artist would frame as the “core” of a spectral presence. Everything nearby should catch a faint reflection of that glow, fading out the further it gets from the source. Trace the light mentally before you paint a single stroke: which folds of robe would catch the glow, which parts of the base beneath the figure would pick up a faint cast reflection.

    Building the Glow

    Work from dark to light in thin glazes, the same way you built up the wash layers. Start with a heavily thinned mix of your glow colour, a cool cyan or spectral green works well for a ghost, applied only in the areas closest to the source. Gradually intensify the colour and add small amounts of white as you move toward the source itself, finishing with a near-white highlight right at the point of “emission.”

    The single most common OSL mistake is making the glow too uniform. Real light falls off quickly, so the transition from bright source to ambient shadow should happen within a very short distance on the model, not gradually across the whole figure. If you’re newer to the technique, a short, focused video is worth more than pages of description. This walkthrough on painting glow effects is a good no-airbrush introduction that translates directly to a spectral subject like Mortamath, and this tutorial on Object Source Lighting goes deeper into the underlying light theory if you want to understand the “why” behind the falloff.

    Where the Glow Meets the Wash

    This is the step painters most often skip, and it’s the one that sells the whole effect. Once your OSL glow is in place, go back over the transition zone with an extremely thin glaze of your wash colour from earlier. This softens the hard edge between “painted glow” and “washed shadow” so the two techniques read as one continuous light source rather than two separate paint jobs sitting side by side.

    Basing Suggestions That Reinforce the Story

    Mortamath’s scenic base already includes roots and scattered skulls, which gives you a head start most miniatures don’t have. The goal at the basing stage is to make sure the ground looks like it belongs to the same unsettling world as the figure standing on it.

    Keep the base’s palette darker and less saturated than the miniature itself. A base that competes for attention pulls the eye away from the figure, when everything about a horror piece should funnel focus back to the subject. A heavy wash across the entire base, followed by a light, dry-brushed highlight only on the most raised texture, keeps it grounded without stealing the spotlight.

    If you’ve built OSL into the figure, let a faint hint of that same glow colour touch the ground immediately beneath the light source. A subtle cast reflection on the base sells the idea that the light is genuinely coming from the model, not just painted onto it in isolation. Static grass or flock should be used sparingly, if at all. A few tufts of dead, desaturated grass around the base’s edge read as far more convincing than a full lawn, and they keep the focus on decay rather than growth.

    Bringing the Whole Piece Together

    Once your washes, OSL, and basing are all in place, step back and check the model from a normal viewing distance rather than under macro lighting. Horror effects that look subtle up close often read perfectly at tabletop distance, and effects that look strong under a desk lamp can occasionally overwhelm the model once it’s viewed the way it’ll actually be seen at the table.

    A final, extremely thin all-over wash in a neutral dark tone can help unify any areas where the different technique passes feel slightly disconnected. Seal with a matte varnish once everything is dry. Horror pieces in particular lose a lot of their atmosphere under a glossy finish, since real shadow and grime don’t reflect light evenly.

    If you want a physical reference to work from while painting, our resin miniature collection includes both Mortamath and the wider Ironworks lineup, each supplied unpainted and ready for exactly this kind of technique work.

    Where myths take form.

    Continue Your Journey

  • Introducing the Ironworks of Aurumdell

    Introducing the Ironworks of Aurumdell

    There’s a particular kind of miniature collection that works because it isn’t just a pile of separately sculpted models. It’s a world. Every piece answers to the same logic, the same aesthetic, the same underlying story — so that when you set them on the table together, they don’t just look good side by side, they look like they belong together. That’s what we set out to build with the Ironworks of Aurumdell, and it’s about time we told you the story behind it.

    This collection started, as most of ours do, with an image: a forge that never stops running, deep underground, powered by something between engineering and obsession. From there, the factions, the characters, and the machinery followed almost naturally. What we ended up with is an industrial fantasy setting with a genuine villain, two very different heroes hunting her, and an army of constructs that range from grimly funny to outright menacing.

    If you’ve browsed our Ironworks of Aurumdell collection and wondered what’s actually going on in this world, this is the post for you.

    The Setting: A Forge That Was Never Meant to Stop

    Aurumdell isn’t a kingdom or a city in the traditional fantasy sense. It’s a complex — furnaces, relay towers, generator blocks, and modular pipework threading through chambers lit only by arcane fire. Nobody lives in Aurumdell so much as they work in it, and the line between industry and something darker gets thinner the deeper you go.

    The aesthetic we’re chasing here sits somewhere between steampunk and industrial horror. Rivets and panel lines instead of runes and filigree. Amber boilers instead of glowing gemstones. It’s fantasy built by engineers rather than wizards, which is exactly why resin was the right call for sculpting it — the level of mechanical detail resin can hold, down to individual seams and joint housings, is what sells the illusion that these things were actually built, not conjured.

    An Aesthetic With a Purpose

    That industrial grounding matters because it changes how the magic in this world reads. Nothing here is elegant. The constructs aren’t summoned, they’re assembled. The transformations aren’t graceful, they’re surgical and a little unsettling. When arcane power shows up in Aurumdell, it shows up as a green-glowing boiler or a soul bound into a chassis, not a shimmering portal. That grounding is what gives the setting its teeth.

    Phiera: The Queen of the Forge

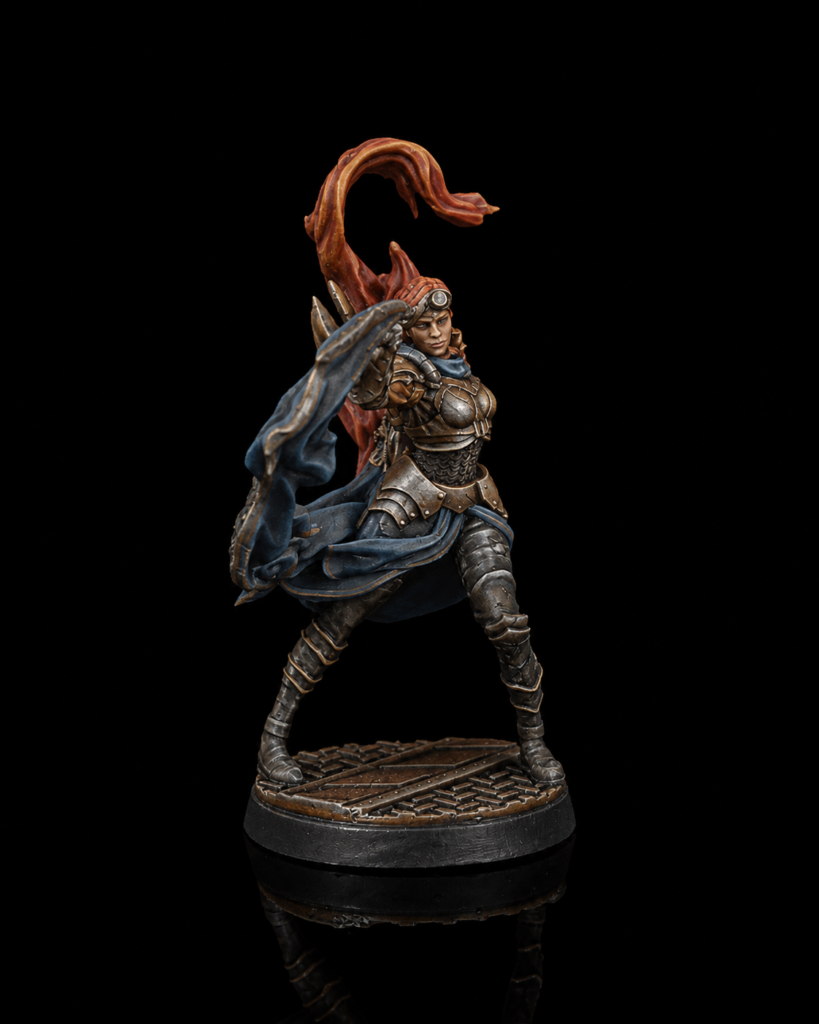
    Every good industrial fantasy setting needs someone driving the machine, and in Aurumdell, that’s Phiera. She wasn’t always the Queen of the Forge. She was, once, a gifted elven artificer working within the bounds of accepted practice — until she walked away from tradition entirely and into the forbidden engineering that now defines her.

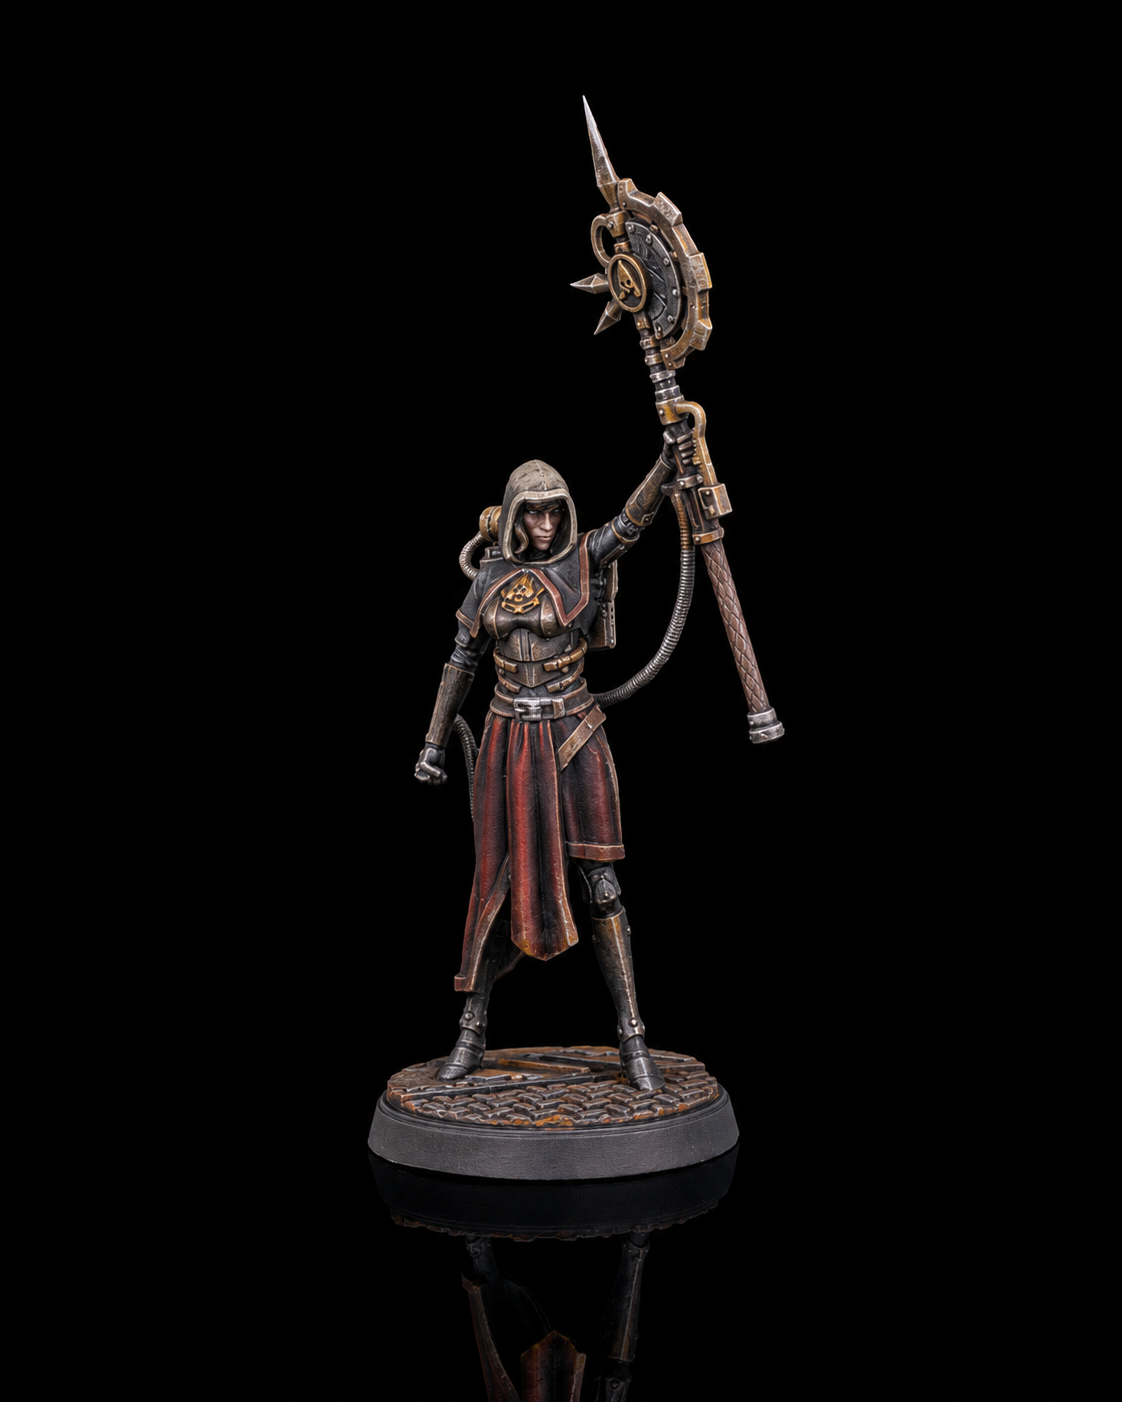
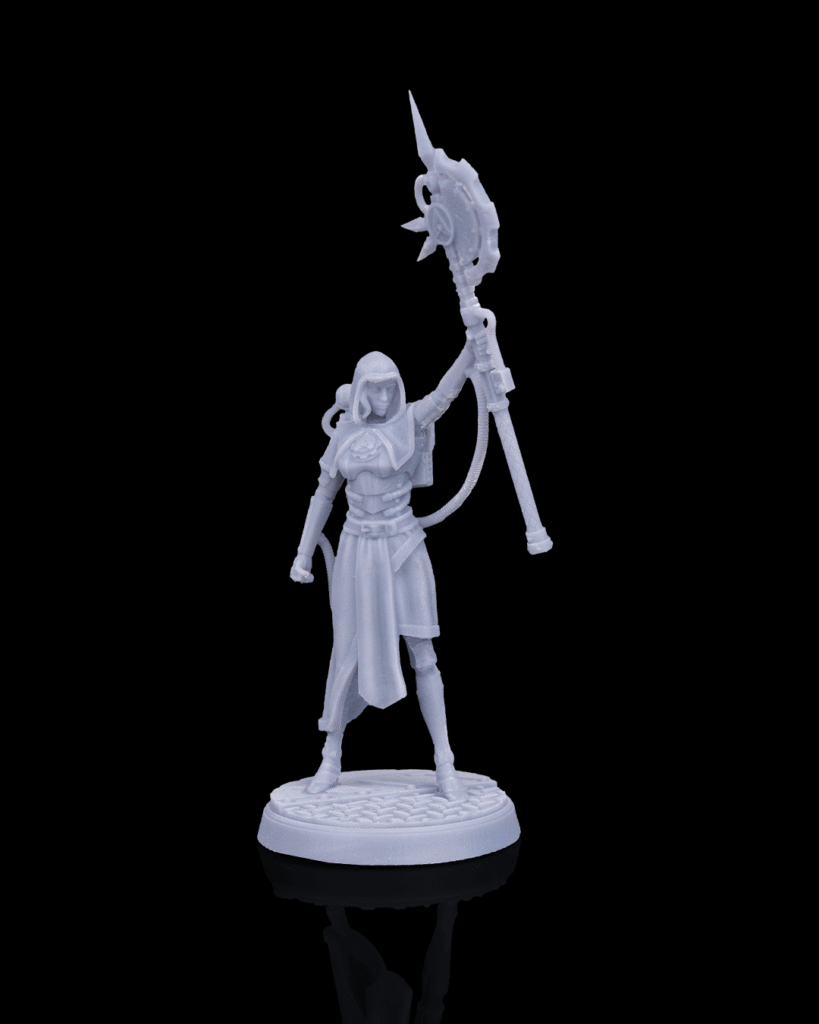
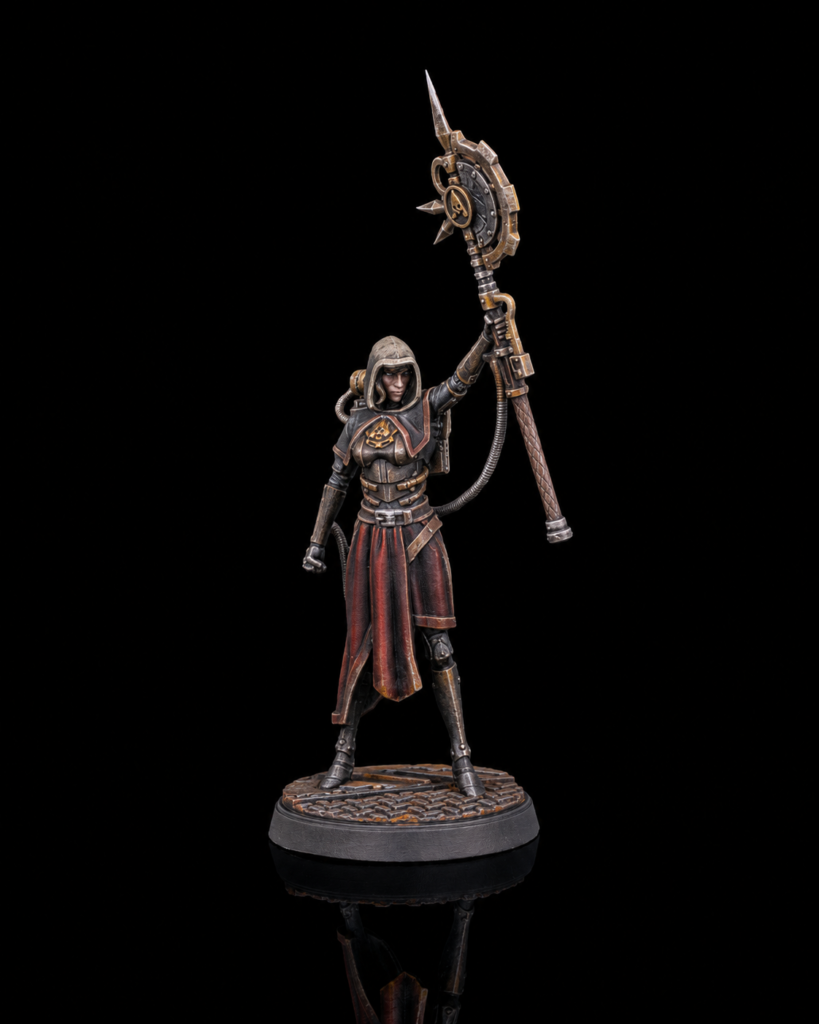
    The transformation shows. One arm iron, one arm flesh. A spiked arcane stave carried less like a tool and more like a declaration. She’s remade herself the same way she remakes everything else in her domain: with purpose, without much concern for what she has to sacrifice to get there. The forge doesn’t sleep because she doesn’t let it.

    Unpainted mini
    An idea of how she could look painted

    What makes Phiera work as a villain for the tabletop isn’t raw menace, it’s ambition with a coherent internal logic. She’s not building an army to conquer — she’s building because building is what she does, and the scale of what she’s building has simply outgrown any reasonable definition of restraint. That’s a villain your players can understand even as they’re fighting their way through her constructs.

    The Army She Built

    This is the part of the collection most people ask about first, and for good reason — it’s where the industrial fantasy concept really gets to show off.

    The Drones: Welder, Cutter, and Driller

    Start with the drones. Welder, Cutter, and Driller began life as worker units — practical, purpose-built, unremarkable. They still carry that worker-drone DNA in their design: functional chassis, task-specific tooling, nothing wasted on ornamentation. But there’s a dark comic streak running through them too, a sense that something in their original engineering never quite worked as intended.

    All three drones share a creator, and that shared origin becomes a genuinely useful thread if you’re running them as a set on the table. They read as siblings — not identical, but built from the same hand, with the same slightly-off sensibility underneath the practical exterior. If you’re looking for an easy entry point into the collection, the drone trio is where most people start.

    The Golden Strider Golem

    Where the drones are workers, the Golden Strider Golem is something else entirely. This is a soul-animated construct — not a machine given purpose by clever engineering, but a body given purpose by something that used to be a person. That distinction matters a lot in Aurumdell’s internal logic. The drones are built. The Golden Strider Golem was made.

    On the table, it plays as elite heavy infantry: towering, deliberate, and unsettling in a way that has nothing to do with size. It’s one of the pieces we get asked about most in terms of painting technique, and for good reason — the surface detail rewards careful metallic work and object-source lighting around the areas where the soul-binding shows through.

    The Carcinowalker

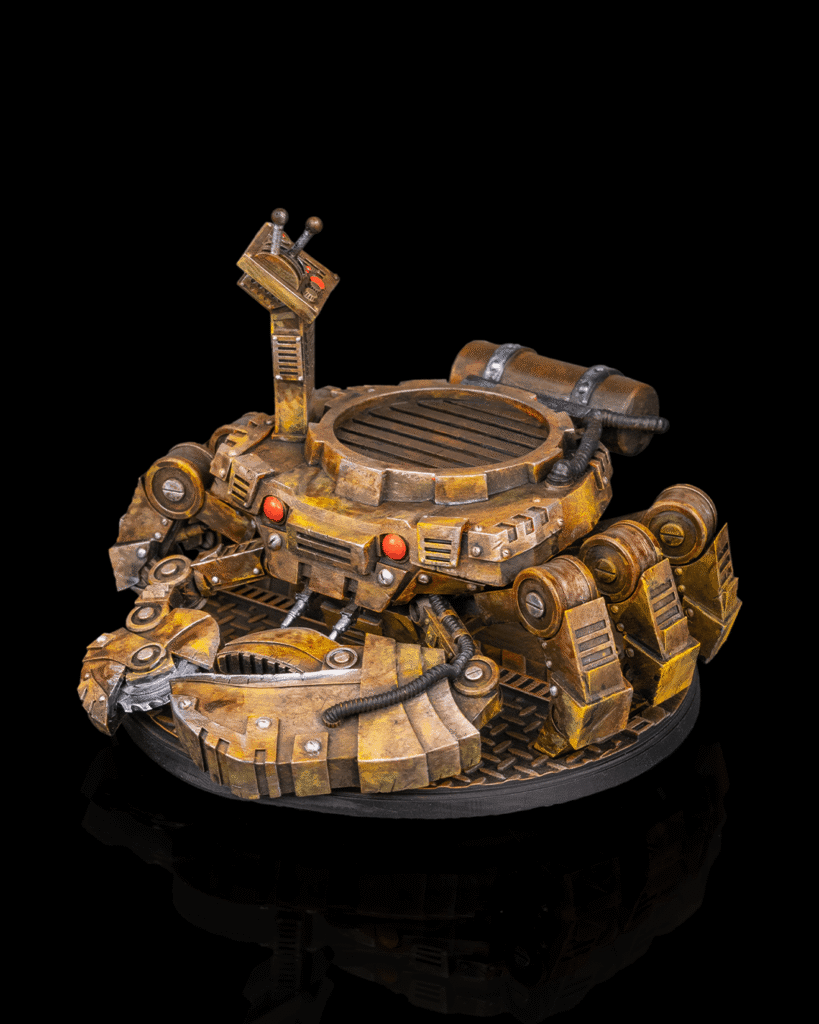
    And then there’s the Carcinowalker, the collection’s centrepiece for a reason. This is Phiera’s personal mount: a massive crab-construct, indestructible by design, built to carry a queen who does not walk when she can be carried. It’s the largest model in the range, and it’s meant to be — everything about its proportions and its stance is built to communicate “boss encounter” the moment it hits the table.

    The Carcinowalker also does something the rest of the collection doesn’t quite manage on its own: it makes Phiera’s ambition tangible. A queen who can build something like this isn’t a minor threat, and the model earns that reputation through sheer mechanical presence. If your table needs a final encounter for an Aurumdell-themed campaign arc, the Carcinowalker is built for exactly that job.

    Rounding Out the Ranks

    The rest of Phiera’s forces fill out the world without stealing focus from the three centrepieces above. The Steam Rhinodrome — amber boiler, single green eye, built like it could go through a wall without noticing — plays as a heavier shock unit. The Murder Barrel is exactly what the name suggests, and its origin as an engineering joke that stopped being funny somewhere along the way is a nice piece of dark humour running underneath the rest of the collection’s more serious tone.

    Those Who Oppose Her

    No forge-queen worth the name goes unchallenged, and Aurumdell gives you two very different heroes to run against Phiera’s constructs.

    Cinder Sparks was raised by fire elementals and is hunting the Queen for something specific that was taken from her — a personal grudge rather than a general crusade, which makes her easy to drop into an existing campaign as a rival, an ally, or a wildcard depending on what your table needs. Dr. Kronenberg is the harder case: a soldier and scientist rebuilt in Phiera’s own image, slowly and quietly starting to question everything he was remade to believe. He’s less a straightforward hero than a character on the edge of his own turn, which is exactly the kind of moral complexity that makes for a memorable NPC.

    Together, they give you a way into Aurumdell that isn’t just “kill the villain’s robots.” There’s a real emotional throughline running underneath the industrial spectacle, if your group wants to use it.

    Why We Built This in Resin

    We keep coming back to this point because it genuinely matters for a collection like this one: the mechanical detail is the selling point, and resin is what makes that detail survive the printing process intact. Panel lines, rivet rows, joint housings, the layered plating on the Golden Strider Golem — none of that reads properly at 32mm scale without the resolution resin gives you. FDM has its place in our catalogue, but Aurumdell was always a resin collection from the first concept sketch.

    Every piece in the range is printed to order, supplied unpainted and ready for your palette, and built at 32mm scale for standard tabletop use, with the Carcinowalker and Steam Rhinodrome sized up on larger creature bases to match their role on the table.

    What’s Next for Aurumdell

    This deep-dive is really just the front door. We’ve got character spotlights and painting guides planned for individual pieces in the collection — starting with the drone trio and working through toward the Carcinowalker as a dedicated centrepiece painting tutorial. If there’s a specific model or a specific technique you want covered first, that’s exactly the kind of thing worth flagging to us directly.

    For now, if this is your first look at the collection, the full Ironworks of Aurumdell range is the best place to see how all of these pieces sit together on the table.

    Where myths take form.

    Continue Your Journey